6 Key Tasks To Perform After Buying A Domain Name In 2024

No one learns from the beginning itself.
I was no exception.
I had been too foolish to make these mistakes 3 times. It was a streak.
Yes, I failed on three different domains before launching Scale Blogging.
But I do not want you to fall for the same delusions.
If you are the one who has bought a domain name, you may feel lost due to the dozens of duties lined up.
In this definitive guide, I will tell you exactly & step-by-step what you should do after buying a domain name.
Let’s begin.
I Have A Domain Now What?
1. Get a web hosting
Note: If you have already bought a hosting while buying a domain name from the same company, then you can skip this step.
The majority of people buy a domain name to create a website or a blog.
In this case, relying only on a domain name can help you achieve hardly a few things. You need hosting with a domain name to set up a perfect website.
Hosting is your personal space on the internet.
And if you are the one who is planning to build a website/blog, then you can buy hosting from the place where you bought a domain.
However, Hostinger is a great option for beginners. It is not only affordable for beginners but also gives extra benefits to its users such as free Top Level Domain Name, free SSL, 24*7 support, and much more.
Not only that, with their one-click WordPress setup, you can get your site live and running within minutes (more on that later).
Powering millions of active users, Hostinger is one of the best web hosting companies out there.
With their $3.99/month pricing plan inclusive of all awesome features, you can’t go any wrong with Hostinger.
Once you purchase hosting, you can then connect our domain with hosting.
It may seem a bit confusing, but it isn’t.
All you need to do is to locate the current DNS nameservers of your domain and alter them with that of the new ones as per your hosting’s obligations.
With their top-rated chat & phone support, you can ask them any query that you face and they will solve it within a matter of time.
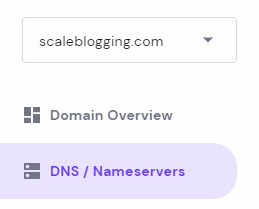
After doing so, your domain and the hosting will be connected within 24 hours.
It usually takes less than an hour.
After connecting both, let’s move on to the next step.
This is for you if you are an exception and still haven’t bought a domain name:
To be exact, if you are puzzled whether to go with a weird domain name or your own name as a domain, then you can have a look at this guide.
2. Create an email relevant to the domain
As email marketing is becoming more prevalent after technological advancements, it is WISDOM to make use of your email for your business the right way.
You can either choose to keep a general email name that Gmail, Outlook, or Yahoo has to provide.
To be specific, they look something like this:
Let’s say our Elon runs an eCommerce site and sells t-shirts for men. In this case, using this email id on his site may not be a great option.
Why?
When Elon sends them the thank you email after they purchase from his site, they expect to see something related to his brand on the email or else they will directly throw it away in the trash.
That’s why it is necessary to choose a domain name relevant to your brand.
A business email looks something like this:
Here, you can easily identify the intent behind the email.
And it looks professional.
Luckily, it is easy to set up.
After buying hosting, the most company gives free business email accounts where you can create one.
Even with a basic plan of Hostinger, you will be able to access all these features for free.
In case of confusion, here are the easy steps to secure a free business email with Hostinger:
- I assume you have purchased hosting and connected it with your domain. If not, then do it right now. A basic plan works like charm for beginners.
- Login to the hosting dashboard and head over to their hosting panel (or CPanel).
- Find email accounts under the email section. If you are unable to find it, there will be a search button to search directly.
- In email accounts, click on the create button and you will be easily able to create a business email of your choice.
That’s all.
With that out of the way, let’s move to the next task.
3. Book your social profiles
If you want to drive more traffic to your website, you need to leverage the power of the proper social media platforms.
In fact, social media platforms like Pinterest and Quora are one of the main reasons I attract a reasonable amount of visitors from all over the world within a less span consistently.
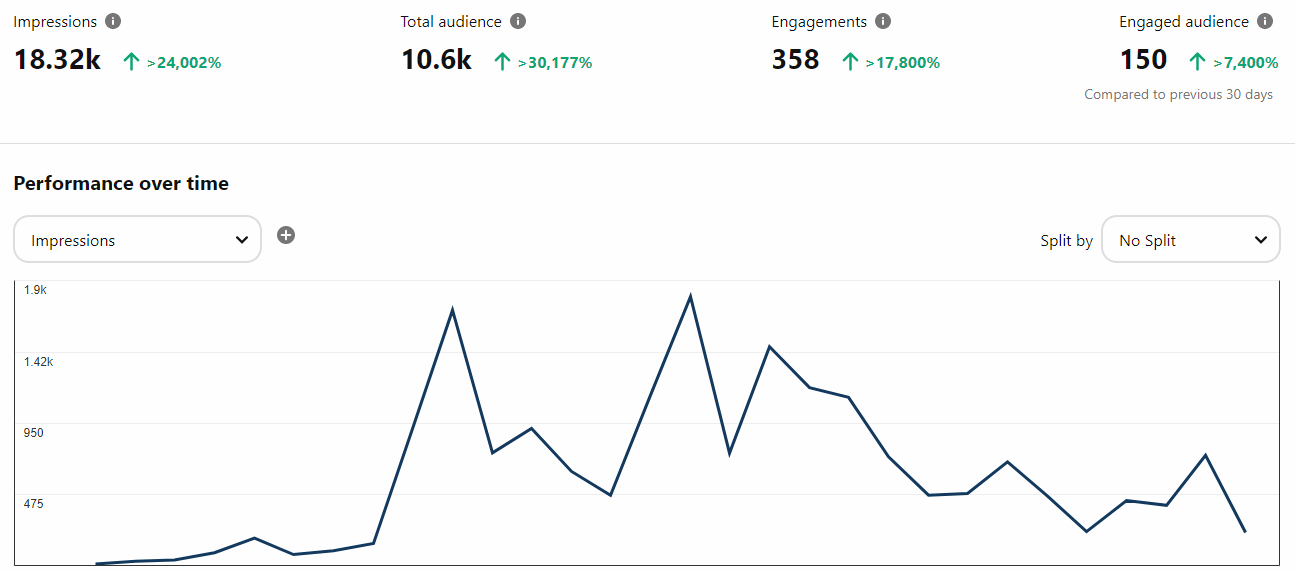
Irrespective of your usage, you should book your social media profiles under your business name as soon as possible.
Or else anyone in this world has a chance to grab it while you are asleep.
Just like a business email, it is necessary to choose social names relevant to your brand.
If you don’t do so, then your audience will not trust you.
What to do exactly, anyways?
Instead of creating an account on each and checking whether your business name is available or not, do this:
- 1. Make a list of all the social media platforms that you are going to use for the benefit of your site.
- 2. Then head over to Namechk to find the availability.
- 3. You can type in your business name and it will show you all the platforms where you can use this name and all the places where the name is already taken with the help of color change:

This is a great time-saver site that I stumbled upon recently.
A relevant username on your social media profile somehow increases the overall authority and position rankings within the platform itself.
Create them deliberately.
4. Create a blog/website
This is a big one.
Now comes some serious yet fascinating tasks to accomplish.
You have done everything from buying a domain name, hosting, getting a professional email address, and creating your social profiles.
In this step, you will do all activities spanning from using the right CMS, designing & branding your website, creating content, adding an SSL, planning blog content, and much more.
It is not possible to cover all those things in a single article – that’s why I have recently created a single yet definitive guide on the blog launch checklist where you will learn all the essentials of creating your blog/website.
But as of now, let me cover some of the most important ones in brief:
Choosing the right CMS
CMS stands for Content Management System.
Without any doubt, WordPress is the most well-known CMS in the world.
With it powering over 40% of the total websites, it is easy to use even if you are a non-techie who doesn’t know how to code.
As discussed earlier, the process of installing WordPress is very simple.
Once you buy a domain name and the hosting, most hosting companies will guide you in installing WordPress.
However, Hostinger takes it to another level with its one-click WordPress setup.
With a single click, they will help you get your site live in a blink of an eye.
Not bad.
Picking suitable themes and plugins for your site
Being a conscious WordPress user, I know how important it is to choose the right themes and plugins for your site.
Plugins help in enhancing your site by adding various designs, customizations, improving user experience, adding features, etc.
Themes, on the other hand, helps in structuring your site. A good theme also helps in improving the overall site speed through their no-fluff coding construction.
Install a wrong plugin and it may cost you the whole site.
It is recommended to install as few plugins as possible. More than 15 plugins are not appreciated as it slows down the speed.
Here is the list of some must-have PLUGINS that are terrifically useful:
- WP Rocket (Premium – Cache files and improve site speed)
- W3 Total Cache (Freemium – Free alternative for WP Rocket)
- Rank Math (Freemium – Best SEO plugin to optimize your total website for SEO)
- Elementor (Freemium – The only page builder you will ever need to design every page/post of your site)
- iThemes Security (Free – Reliable security plugin for optimum protection against invader)
Besides this, you may want to alter your plugins list by either adding a relevant plugin or removing the useless plugin as per your needs and wants.
Either way makes sure that you keep the number below 15 for best practices.
If we talk about themes, I have only used a few of them and all of them are insightful:
- GeneratePress (Freemium – Lightweight & responsive WordPress theme with regular updates and every great that you may require)
- Astra (Freemium – Same performance as GeneratePress but sometimes, Astra works great in terms of speed especially when investing in its premium version)
- Kadence (Freemium – Trusted by WordPress experts and highly up-to-date AND effective theme. Free version has itself got many great options)
This was all about the themes and plugins.
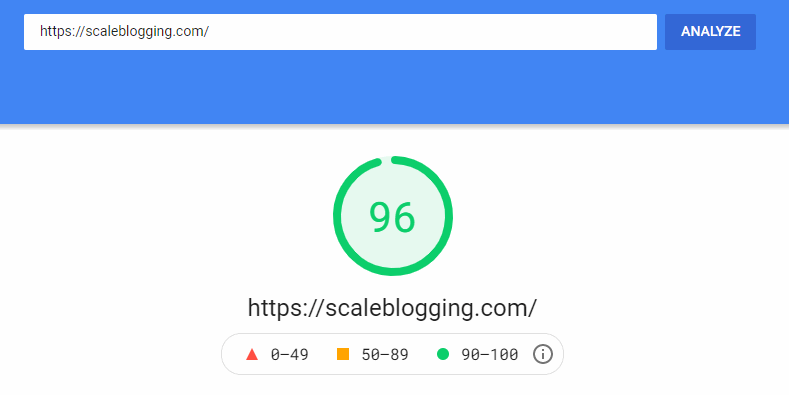
Instead of relying on what I say or what anyone in this world says, try every good theme one by one, split test them all & measure the performance of each.
I did the same thing. Eventually GeneratePress Premium turned out to be a game-changer for my blog not only in terms of speed but also in other aspects.
Not bad.
After finishing this step, you need to tweak in few important changes with your site icon, site’s tagline, setting up the permalink, creating legal pages, etc.
You will be able to do all those things smoothly.
Now comes the writing part.
Create content
This is fun.
Hopefully, you have your site live on the internet.
After completing all these minor yet important things, you need to focus on the most important element.
You need to write spellbound articles that rank on Google if you wish to bring in additional organic traffic.
The articles should be epic and well written than what’s already ranking out there.
To make your article more versatile, you will need to do keyword research, include multimedia, nail out on-page SEO, etc.
Most beginners find keyword research a burden.
But believe me, it’s much more fun when you have the right tool. I recommend using KWFinder. It is a great keyword research tool for beginners.
Have a look at the KWFinder review to fathom the working of this tool better.
Also, go through this ultimate guide on how to write an exceptional blog post for understanding every minute detail at length without committing any blunders.
After reading that in-depth article, you will be well-versed with writing content that is optimized for your audience as well as the search engines.
Afterward, here are some of the most useful articles on writing for further improvement:
- 8 Unbelievable Benefits of Writing
- 11 Sensational Ways to Enjoy Your Writing More
- 15 Untapped Ways to Motivate Yourself to Write Every Day
Talking more about writing, try to make it engaging with the use of storytelling.
Don’t run after complex words. It will only make things more wrong.
Pro Tip: Use Grammarly to correct grammatical errors, proofread your articles and improve your writing tone. Trust me, you don’t want to sound like a fool by making silly typos.
Read definitive Grammarly review to know more about this wonderful tool. These were the top-notch things that you should never compromise on.
Content marketing is half a game followed by content promotion, etc.
Creating a decent site is no more a big deal if you adopt the right strategies and invest your time in learning these tactics.
Everything is simple. We are the ones who make it complicated unnecessarily.
Remember I included only a few important points under creating a website part. Don’t forget to check out the complete blog launch checklist to uncover everything.
With that, let’s get into a bit more serious part.
5. Add your site to Google Analytics & GSC
Content and all is fine.
But if you are a blogger then you probably want your content to rank on the search engines.
And this is not possible unless you connect your site with Google Search Console. Also, to track your visitors’ footprints, you need to connect your site with Google Analytics.
Both of them require inserting a given code snippet into your site in the header.php file of your theme editor.
It’s very easy to connect both of them. And you will get dozens of youtube videos that show you exactly how to do it.
However, lets me quickly guide you for GSC.
First of all, head over to Google Search Console and sign up. After login, you should see something like:

You can either connect through a Domain or a URL prefix.
I prefer to choose the latter one where you need to enter your site’s URL and then paste the given code directly into your header.php file.
It’s easy.
After connecting both of these platforms, your content will start getting quickly indexed on Google and you will be able to track your visitors promptly to understand their behavior.
In fact, these two free tools by Google are a goldmine for any person running a site. Even if you are running a local online business, this can be of great help.
6. Start collecting leads for a more stable business
Collecting emails are called leads in the world of digital marketing.
Whether you have purchased a domain name for blogging, an eCommerce site, an online business, a personal brand, or anything else, email marketing is a great way to retain your existing customers.
One email can be worth more than a buck if you use it wisely.
If you have read some of my previous articles, I have largely quoted the importance of collecting emails.
As a blogger, it will assist you in bringing consistent traffic to even the older articles.
As an eCommerce site, it will help you get a great review for your products by sending them a follow-up email as a “review request” just like Amazon.
No matter what, if you have a site that is not dead, then start collecting leads from today.
Good days will arrive soon.
Commonly Asked FAQs On – I Have A Domain Now What
Keep Grinding
This was my definitive answer to – “I just bought a domain now what?”.
I hopefully assume that after reading this guide, you will be able to make better use of your domain.
If followed properly, these steps can not only help in setting up a site quickly but also in making it novel than random million dead blogs.
This was all up to me.
Now, I would like to hear from you.
Did I miss anything important that should be included after buying a domain name?
Let me know by leaving a quick comment below right now.
Now go and make yourself proud with your domain.
Disclosure: This post contains affiliate links. This means we may make a small commission if you make a purchase.


